快速入門
本指南將逐步引導您在 Electron 中建立一個基本的 Hello World 應用程式,類似於 electron/electron-quick-start。
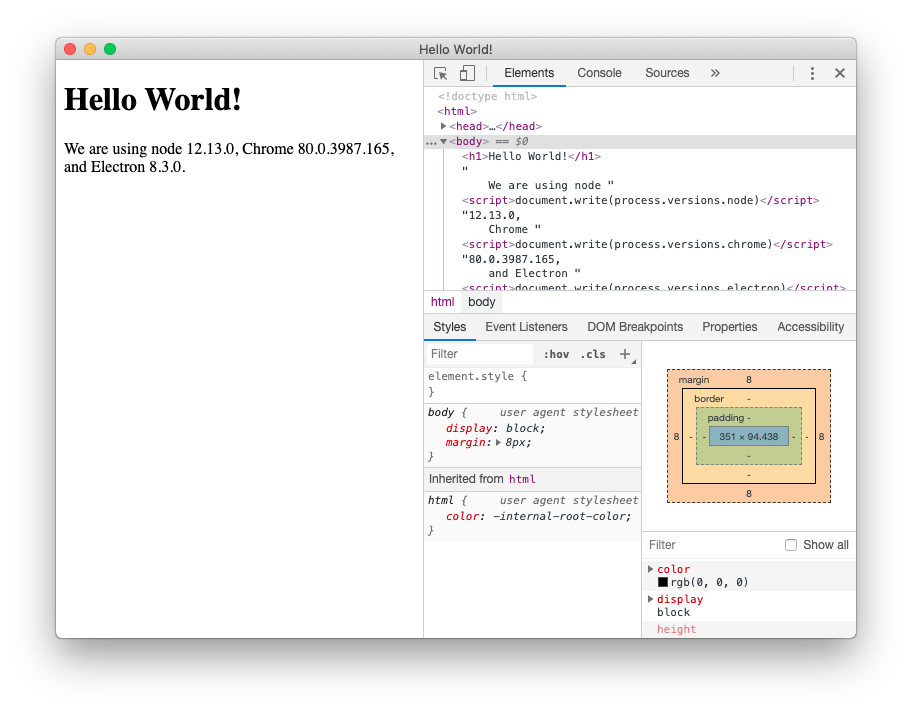
在本教學結束時,您的應用程式將開啟一個瀏覽器視窗,其中顯示一個網頁,其中包含有關正在執行的 Chromium、Node.js 和 Electron 版本資訊。
先決條件
要使用 Electron,您需要安裝 Node.js。我們建議您使用最新的 LTS 版本。
請使用針對您的平台預先建置的安裝程式來安裝 Node.js。否則,您可能會遇到與不同開發工具不相容的問題。
若要檢查 Node.js 是否正確安裝,請在您的終端機用戶端中輸入以下命令
node -v
npm -v
這些命令應會分別印出 Node.js 和 npm 的版本。
注意:由於 Electron 將 Node.js 嵌入到其二進位檔中,因此執行您的程式碼的 Node.js 版本與您系統上執行的版本無關。
建立您的應用程式
架構專案
Electron 應用程式遵循與其他 Node.js 專案相同的通用結構。首先,建立一個資料夾並初始化一個 npm 套件。
- npm
- Yarn
mkdir my-electron-app && cd my-electron-app
npm init
mkdir my-electron-app && cd my-electron-app
yarn init
互動式 init 命令會提示您在設定中設定一些欄位。為了本教學的目的,有一些規則要遵循
entry point應為main.js。author和description可以是任何值,但對於應用程式封裝來說是必要的。
您的 package.json 檔案應如下所示
{
  "name": "my-electron-app",
  "version": "1.0.0",
  "description": "Hello World!",
  "main": "main.js",
  "author": "Jane Doe",
  "license": "MIT"
}
然後,將 electron 套件安裝到您應用程式的 devDependencies 中。
- npm
- Yarn
npm install --save-dev electron
yarn add --dev electron
注意:如果您在安裝 Electron 時遇到任何問題,請參閱進階安裝指南。
最後,您需要能夠執行 Electron。在您 package.json 設定的scripts欄位中,新增一個 start 命令,如下所示
{
  "scripts": {
    "start": "electron ."
  }
}
此 start 命令可讓您在開發模式下開啟您的應用程式。
- npm
- Yarn
npm start
yarn start
注意:此腳本會告訴 Electron 在您專案的根資料夾中執行。在此階段,您的應用程式會立即拋出錯誤,告訴您找不到要執行的應用程式。
執行主要程序
任何 Electron 應用程式的進入點都是其 main 腳本。此腳本控制 主要程序,該程序在完整的 Node.js 環境中執行,並負責控制您應用程式的生命週期、顯示原生介面、執行特殊權限操作和管理渲染器程序(稍後將詳細介紹)。
在執行期間,Electron 會在應用程式 package.json 設定的main 欄位中尋找此腳本,您應該在應用程式架構步驟中已設定該欄位。
若要初始化 main 腳本,請在專案的根資料夾中建立一個名為 main.js 的空檔案。
注意:如果您此時再次執行
start腳本,您的應用程式將不再拋出任何錯誤!但是,它仍然不會做任何事情,因為我們還沒有在main.js中新增任何程式碼。
建立網頁
在我們可以為應用程式建立視窗之前,我們需要建立將載入其中的內容。在 Electron 中,每個視窗都會顯示可從本機 HTML 檔案或遠端 URL 載入的網頁內容。
對於本教學,您將執行前者。在專案的根資料夾中建立一個 index.html 檔案
<!DOCTYPE html>
<html lang="en">
  <head>
    <meta charset="UTF-8">
    <!-- https://developer.mozilla.org/en-US/docs/Web/HTTP/CSP -->
    <meta http-equiv="Content-Security-Policy" content="default-src 'self'; script-src 'self'">
    <title>Hello World!</title>
  </head>
  <body>
    <h1>Hello World!</h1>
    We are using Node.js <span id="node-version"></span>,
    Chromium <span id="chrome-version"></span>,
    and Electron <span id="electron-version"></span>.
  </body>
</html>
注意:查看此 HTML 文件,您會發現主體文字中缺少版本號碼。我們稍後將使用 JavaScript 手動插入它們。
在瀏覽器視窗中開啟您的網頁
現在您有了網頁,請將其載入到應用程式視窗中。若要執行此操作,您需要兩個 Electron 模組
app模組,用於控制您應用程式的事件生命週期。BrowserWindow模組,用於建立和管理應用程式視窗。
因為主要程序會執行 Node.js,所以您可以將它們匯入為 main.js 檔案頂部的CommonJS 模組
const { app, BrowserWindow } = require('electron')
然後,新增一個 createWindow() 函式,將 index.html 載入到新的 BrowserWindow 執行個體中。
const createWindow = () => {
  const win = new BrowserWindow({
    width: 800,
    height: 600
  })

  win.loadFile('index.html')
}
接下來,呼叫此 createWindow() 函式以開啟您的視窗。
在 Electron 中,只有在觸發 app 模組的 ready 事件之後才能建立瀏覽器視窗。您可以使用 app.whenReady() API 等待此事件。在 whenReady() 解析其 Promise 後呼叫 createWindow()。
app.whenReady().then(() => {
  createWindow()
})
注意:此時,您的 Electron 應用程式應會成功開啟一個視窗,其中顯示您的網頁!
管理視窗的生命週期
雖然您現在可以開啟瀏覽器視窗,但您還需要一些額外的樣板程式碼,使其在每個平台上感覺更原生。應用程式視窗在每個作業系統上的行為都不同,而 Electron 則將在應用程式中實作這些慣例的責任放在開發人員身上。
一般而言,您可以使用 process 全域的 platform 屬性來執行特定作業系統的程式碼。
當所有視窗都關閉時退出應用程式 (Windows & Linux)
在 Windows 和 Linux 上,退出所有視窗通常會完全退出應用程式。
若要實作此功能,請監聽 app 模組的 'window-all-closed' 事件,如果使用者不是在 macOS (darwin) 上,則呼叫 app.quit()。
app.on('window-all-closed', () => {
  if (process.platform !== 'darwin') app.quit()
})
如果沒有開啟任何視窗,則開啟一個視窗 (macOS)
雖然 Linux 和 Windows 應用程式在沒有開啟任何視窗時會退出,但 macOS 應用程式通常即使沒有開啟任何視窗也會繼續執行,並且在沒有可用視窗時啟動應用程式應會開啟一個新視窗。
若要實作此功能,請監聽 app 模組的 activate 事件,如果沒有開啟任何瀏覽器視窗,則呼叫您現有的 createWindow() 方法。
因為視窗無法在 ready 事件之前建立,所以您應該只在您的應用程式初始化之後監聽 activate 事件。透過從您現有的 whenReady() 回呼內附加您的事件監聽器來執行此操作。
app.whenReady().then(() => {
  createWindow()

  app.on('activate', () => {
    if (BrowserWindow.getAllWindows().length === 0) createWindow()
  })
})
注意:此時,您的視窗控制項應可完全正常運作!
使用預先載入腳本從渲染器存取 Node.js
現在,最後要做的是將 Electron 及其相依性的版本號碼列印到您的網頁上。
透過 Node 的全域 process 物件,在主要程序中存取此資訊很容易。但是,您不能只從主要程序編輯 DOM,因為它無法存取渲染器的 document 內容。它們完全在不同的程序中!
注意:如果您需要更深入地了解 Electron 程序,請參閱程序模型文件。
這時候,將預載腳本附加到渲染器就派上用場了。預載腳本會在渲染器程序載入之前執行,並且可以存取渲染器的全域變數(例如 window 和 document)以及 Node.js 環境。
建立一個名為 preload.js 的新腳本,如下所示
window.addEventListener('DOMContentLoaded', () => {
  const replaceText = (selector, text) => {
    const element = document.getElementById(selector)
    if (element) element.innerText = text
  }

  for (const dependency of ['chrome', 'node', 'electron']) {
    replaceText(`${dependency}-version`, process.versions[dependency])
  }
})
上面的程式碼會存取 Node.js 的 process.versions 物件,並執行一個基本的 replaceText 輔助函式,將版本號碼插入 HTML 文件中。
若要將此腳本附加到渲染器程序,請將預載腳本的路徑傳遞到現有 BrowserWindow 建構函式中的 webPreferences.preload 選項。
const { app, BrowserWindow } = require('electron')
// include the Node.js 'path' module at the top of your file
const path = require('node:path')

// modify your existing createWindow() function
const createWindow = () => {
  const win = new BrowserWindow({
    width: 800,
    height: 600,
    webPreferences: {
      preload: path.join(__dirname, 'preload.js')
    }
  })

  win.loadFile('index.html')
}
// ...
這裡使用了兩個 Node.js 的概念
我們使用相對於目前正在執行的 JavaScript 檔案的路徑,以便您的相對路徑在開發和封裝模式下都能運作。
額外功能:為您的網頁內容新增功能
此時,您可能會想知道如何為您的應用程式新增更多功能。
對於與您的網頁內容的任何互動,您會希望將腳本新增到您的渲染器程序中。由於渲染器在正常的網頁環境中執行,您可以在 index.html 檔案的結尾標籤 </body> 之前新增 <script> 標籤,以包含您想要的任何任意腳本
<script src="./renderer.js"></script>
然後,renderer.js 中包含的程式碼可以使用與您用於典型前端開發相同的 JavaScript API 和工具,例如使用 webpack 來捆綁和縮小您的程式碼,或使用 React 來管理您的使用者介面。
回顧
依照上述步驟操作後,您應該會有一個功能齊全的 Electron 應用程式,如下所示
完整的程式碼如下所示
// main.js

// Modules to control application life and create native browser window
const { app, BrowserWindow } = require('electron')
const path = require('node:path')

const createWindow = () => {
  // Create the browser window.
  const mainWindow = new BrowserWindow({
    width: 800,
    height: 600,
    webPreferences: {
      preload: path.join(__dirname, 'preload.js')
    }
  })

  // and load the index.html of the app.
  mainWindow.loadFile('index.html')

  // Open the DevTools.
  // mainWindow.webContents.openDevTools()
}

// This method will be called when Electron has finished
// initialization and is ready to create browser windows.
// Some APIs can only be used after this event occurs.
app.whenReady().then(() => {
  createWindow()

  app.on('activate', () => {
    // On macOS it's common to re-create a window in the app when the
    // dock icon is clicked and there are no other windows open.
    if (BrowserWindow.getAllWindows().length === 0) createWindow()
  })
})

// Quit when all windows are closed, except on macOS. There, it's common
// for applications and their menu bar to stay active until the user quits
// explicitly with Cmd + Q.
app.on('window-all-closed', () => {
  if (process.platform !== 'darwin') app.quit()
})

// In this file you can include the rest of your app's specific main process
// code. You can also put them in separate files and require them here.
// preload.js

// All the Node.js APIs are available in the preload process.
// It has the same sandbox as a Chrome extension.
window.addEventListener('DOMContentLoaded', () => {
  const replaceText = (selector, text) => {
    const element = document.getElementById(selector)
    if (element) element.innerText = text
  }

  for (const dependency of ['chrome', 'node', 'electron']) {
    replaceText(`${dependency}-version`, process.versions[dependency])
  }
})
<!--index.html-->
<!DOCTYPE html>
<html lang="en">
  <head>
    <meta charset="UTF-8">
    <!-- https://developer.mozilla.org/en-US/docs/Web/HTTP/CSP -->
    <meta http-equiv="Content-Security-Policy" content="default-src 'self'; script-src 'self'">
    <title>Hello World!</title>
  </head>
  <body>
    <h1>Hello World!</h1>
    We are using Node.js <span id="node-version"></span>,
    Chromium <span id="chrome-version"></span>,
    and Electron <span id="electron-version"></span>.

    <!-- You can also require other files to run in this process -->
    <script src="./renderer.js"></script>
  </body>
</html>
- main.js
- preload.js
- index.html
const { app, BrowserWindow } = require('electron/main')
const path = require('node:path')

function createWindow () {
  const win = new BrowserWindow({
    width: 800,
    height: 600,
    webPreferences: {
      preload: path.join(__dirname, 'preload.js')
    }
  })

  win.loadFile('index.html')
}

app.whenReady().then(() => {
  createWindow()

  app.on('activate', () => {
    if (BrowserWindow.getAllWindows().length === 0) {
      createWindow()
    }
  })
})

app.on('window-all-closed', () => {
  if (process.platform !== 'darwin') {
    app.quit()
  }
})
window.addEventListener('DOMContentLoaded', () => {
  const replaceText = (selector, text) => {
    const element = document.getElementById(selector)
    if (element) element.innerText = text
  }

  for (const type of ['chrome', 'node', 'electron']) {
    replaceText(`${type}-version`, process.versions[type])
  }
})
<!DOCTYPE html>
<html>
<head>
    <meta charset="UTF-8">
    <title>Hello World!</title>
    <meta http-equiv="Content-Security-Policy" content="script-src 'self' 'unsafe-inline';" />
</head>
<body>
    <h1>Hello World!</h1>
    <p>
        We are using Node.js <span id="node-version"></span>,
        Chromium <span id="chrome-version"></span>,
        and Electron <span id="electron-version"></span>.
    </p>
</body>
</html>
總結我們所做的所有步驟
- 我們引導了一個 Node.js 應用程式,並將 Electron 新增為相依性。
- 我們建立了一個
main.js腳本,該腳本會執行我們的主程序,該主程序會控制我們的應用程式並在 Node.js 環境中執行。在此腳本中,我們使用了 Electron 的app和BrowserWindow模組來建立一個瀏覽器視窗,該視窗會在單獨的程序(渲染器)中顯示網頁內容。 - 為了在渲染器中存取某些 Node.js 功能,我們將預載腳本附加到我們的
BrowserWindow建構函式。
封裝和發佈您的應用程式
發佈您新建立的應用程式最快的方法是使用 Electron Forge。
若要為 Linux 建置 RPM 套件,您需要安裝其所需的系統相依性。
-
在您的
package.json檔案中新增描述,否則 rpmbuild 將會失敗。空白描述是無效的。 -
將 Electron Forge 新增為您應用程式的開發相依性,並使用其
import命令來設定 Forge 的支架- npm
- Yarn
npm install --save-dev @electron-forge/cli
npx electron-forge import

✔ Checking your system
✔ Initializing Git Repository
✔ Writing modified package.json file
✔ Installing dependencies
✔ Writing modified package.json file
✔ Fixing .gitignore

We have ATTEMPTED to convert your app to be in a format that electron-forge understands.

Thanks for using "electron-forge"!!!
npm install --save-dev @electron-forge/cli
yarn dlx electron-forge import
✔ Checking your system
✔ Initializing Git Repository
✔ Writing modified package.json file
✔ Installing dependencies
✔ Writing modified package.json file
✔ Fixing .gitignore
We have ATTEMPTED to convert your app to be in a format that electron-forge understands.
Thanks for using "electron-forge"!!! -
使用 Forge 的
make命令建立可發佈的程式- npm
- Yarn
npm run make

> my-electron-app@1.0.0 make /my-electron-app
> electron-forge make

✔ Checking your system
✔ Resolving Forge Config
We need to package your application before we can make it
✔ Preparing to Package Application for arch: x64
✔ Preparing native dependencies
✔ Packaging Application
Making for the following targets: zip
✔ Making for target: zip - On platform: darwin - For arch: x64
yarn make
> my-electron-app@1.0.0 make /my-electron-app
> electron-forge make
✔ Checking your system
✔ Resolving Forge Config
We need to package your application before we can make it
✔ Preparing to Package Application for arch: x64
✔ Preparing native dependencies
✔ Packaging Application
Making for the following targets: zip
✔ Making for target: zip - On platform: darwin - For arch: x64Electron Forge 會建立
out資料夾,其中將會放置您的套件// Example for macOS
out/
├── out/make/zip/darwin/x64/my-electron-app-darwin-x64-1.0.0.zip
├── ...
└── out/my-electron-app-darwin-x64/my-electron-app.app/Contents/MacOS/my-electron-app